I just recently heard about this
rather awesome challenge, and have done a couple of practice rounds to try and figure out a method that worked for me. This month I think I (almost) figured out how my mind works!
In short, over at the
Counterfeit Kit Challenge, you build a kit from your stash that is inspired by the “store bought” inspiration kit chosen by the challenge. Think of it this way, it’s like a mood board for kit building!
For the month of October the inspiration kit came from
Wild Hare Kits, a kit club that builds a kit based on your needs and preferences! It’s a “personal shopper” for supplies! Anyhow…to be more specific, the kit chosen for the Counterfeit Kit Challenge is the kit that was made for Wild Hare’s September Guest Designer, Mandi Holmes.
Inspiration Kit:


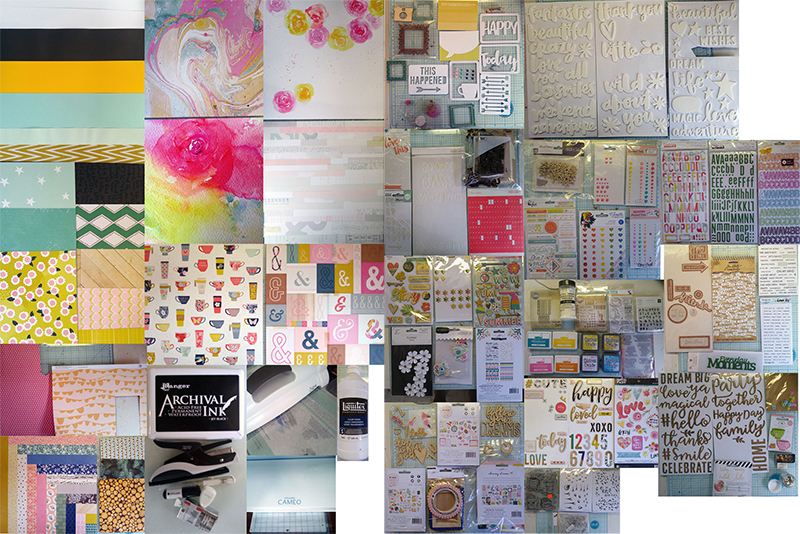
Here is my kit:


And here is my process:
I look at Colors, Patterns/Textures, Alphas, and Embellishments.
In this kit the colors I saw were teal, brown, pink, a little green, and yellow/yellow-orange. The patterns that stood out to me were chevrons, wood, “+,” stars, a little floral, and faux washi. The alphas were brown, wood, and some square sticker alphas then finally, I look at the embellishments. For me I saw sequins, stickers, puffy stickers, and framed phrases. This is it, this is what I listed for myself to use as guidelines as I searched my stash.
I find picking out my patterned papers first works great for me! After all, they tend to be a major part of layouts/projects! I have a rather large supply of papers, but eventually I narrow it down to around twelve.
My patterned paper choices:


While I am picking out my papers, I also pick out some that would work as “cut aparts,” or accents. Either because of their pattern, because of their size, or because I’ve already cut into them!


Next, I choose cardstock (and in this case a sheet of vellum also):

Now the hard part. Embellishments.
For me this means rummaging through ALL of my products that fit under the umbrella term “embellishment.” Initially, I choose A LOT! A lot more than is even remotely reasonable!
And, since my alpha packages are stored in the same cabinet, I also pick some alphas out that would fit my kit! (For the record, I try to pick already opened packages first.)


Now the absolute hardest part. Reduction!
I narrow down all my embellishments and alphas until the fit in this box with my papers and cardstocks. This is how I keep my kit all together, and this is how I force myself to reduce! If I didn’t give myself a maximum space for my kit to occupy, I’d never be able to do the challenge! I would just have to take a photo of my entire room and say, “Look! My kit takes up four walls!” This is also why I am so excited about this challenge…there’s getting to be less and less space for me in my room!

After my box is all packed I throw together my mixed media products (stamps, dies, inks, etc.). They don’t go in the box for two reasons, 1)Inks can leak and 2)They are rather bulky.


And as always, I have my “staple” supplies. One’s that are (almost always) a constant for me no matter the project.


Now, off to try and make a something from all this …